Product photography is one of the most important parts of running an online business, whether you sell on Shopify, Etsy, Amazon, or social media. High-quality images directly affect customer trust and sales, but many beginners assume they need expensive cameras and studio setups to get professional results. In reality, you can build a powerful product photography setup on a budget using simple tools, good lighting, and a smart workspace. With the right approach, even a small home corner can turn into a mini studio that produces clean and attractive product images.
Understanding What You Actually Need
Before buying equipment, it is important to understand that the quality of product photos depends more on lighting and setup than expensive gear. Even smartphone cameras today are powerful enough for professional product photography when used correctly.
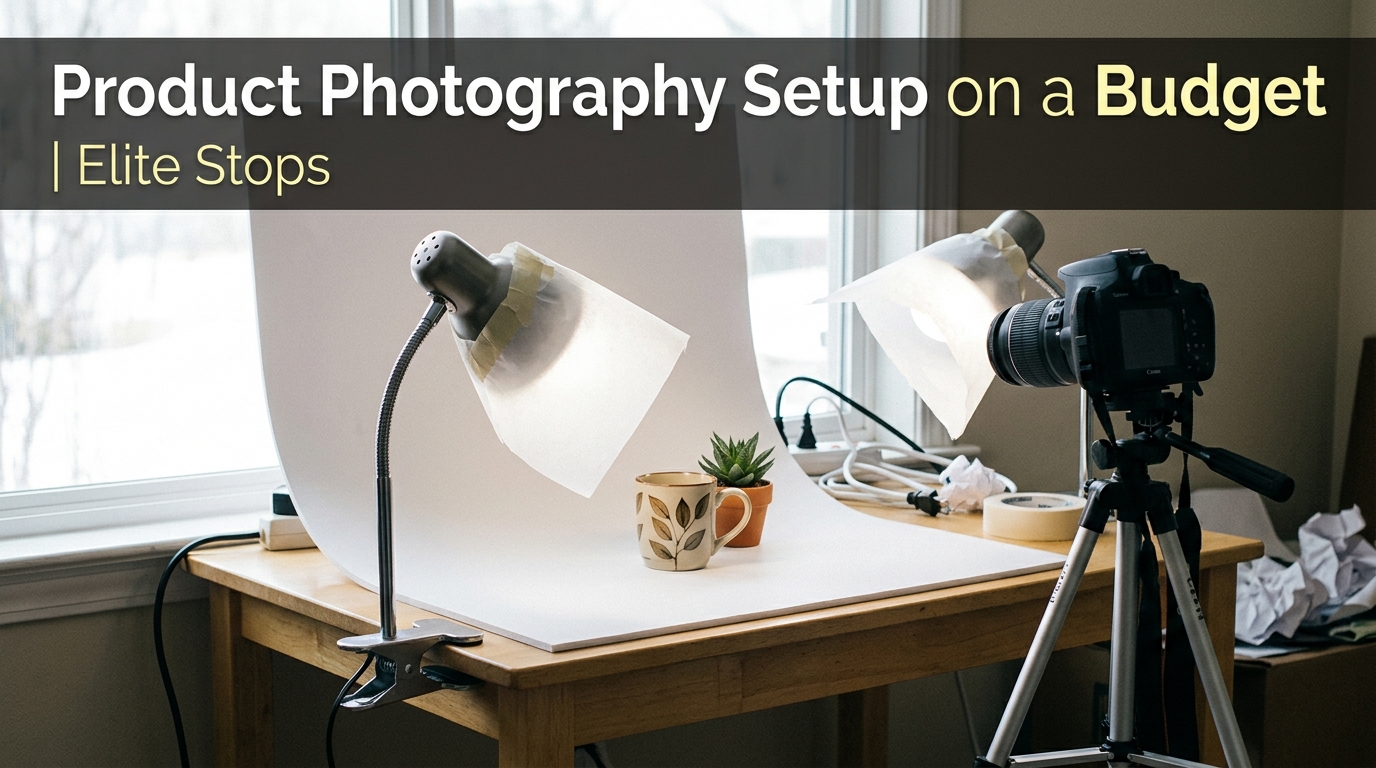
A basic setup usually includes a camera or smartphone, a stable tripod, a clean background, and a good light source. These simple elements are enough to create sharp and appealing product images for online stores. Planning your setup based on your product type also helps, because jewelry, clothing, and electronics may require slightly different lighting styles.
Choosing a Simple Shooting Space at Home
You do not need a professional studio to start product photography. A small corner in your room, near a window, or even a clean table in your living space is enough. Natural light plays a very important role in budget photography because it is free and soft.
A space near a window with white curtains works best because it diffuses harsh sunlight and creates even lighting. You should keep the background clean and distraction-free so that the focus remains on the product. A simple setup space with good light and minimal clutter is often more effective than a complicated studio.
Essential Budget Equipment for Beginners
A budget product photography setup does not require expensive gear. A smartphone with a good camera is usually enough to start. Modern phones can capture high-resolution images that are suitable for online stores.
A tripod is also very important because it keeps your shots stable and consistent. Even a low-cost tripod can significantly improve image quality by removing blur caused by hand movement. For lighting, natural window light is the cheapest and most effective option. However, if needed, you can also use inexpensive LED lamps or ring lights to improve brightness.
For backgrounds, simple white foam boards, poster paper, or fabric sheets work perfectly. These materials help create a clean and professional-looking backdrop without spending much money. A reflector made from white cardboard or foil can also help bounce light and reduce shadows.
Lighting Setup for Professional Results on a Budget
Lighting is the most important factor in product photography. Even the best camera will produce poor results without proper lighting. For beginners, natural light is the easiest and most effective option.
Placing your product near a window provides soft and balanced lighting. To avoid harsh shadows, you can use a white sheet or curtain to diffuse the sunlight. If natural light is not enough, low-cost LED lights placed at an angle can help create even illumination.
A simple two-light setup can also be used, where one light acts as the main source and the other reduces shadows. The goal is to keep lighting soft, even, and natural-looking so that the product details are clearly visible without harsh reflections.
Background Setup for Clean Product Images
The background plays a major role in how professional your product photos look. A cluttered or colorful background can distract customers, while a clean background keeps the focus on the product.
White backgrounds are the most commonly used in e-commerce because they create a clean and consistent look. You can easily create this using white paper, foam boards, or fabric. For more creative shots, wooden surfaces or textured materials can also be used depending on the product style.
The key is to keep the background simple and relevant to the product being photographed.
Camera and Smartphone Settings Tips
Even with a basic smartphone, you can achieve high-quality product photos by using the correct settings. Always use the main camera lens instead of wide-angle modes for better clarity. Keeping the phone stable on a tripod improves sharpness significantly.
It is also important to lock focus and exposure on the product so that the camera does not automatically adjust brightness during shooting. Shooting in natural light with consistent settings helps maintain uniform image quality across all product photos.
Common Mistakes to Avoid
Many beginners make simple mistakes that reduce the quality of their product photos. One common mistake is using mixed lighting sources, such as combining natural light with room lights, which creates color imbalance.
Another mistake is placing the light directly above the product, which can flatten the image and remove depth. Over-editing photos is also a common issue, as it can make the product look unrealistic. Keeping photos natural, sharp, and clean always produces better results.
Conclusion
Building a product photography setup on a budget is completely possible with the right approach. You do not need expensive cameras or studio equipment to create professional-looking images. By focusing on good lighting, a clean background, and a stable setup, you can achieve high-quality results even at home.
In 2025 and beyond, smart sellers understand that creativity and setup matter more than expensive gear. With a simple and well-planned budget setup, you can improve your product presentation, attract more customers, and grow your online business effectively.