Custom glitter cups have become a popular DIY trend for people who love sparkling, stylish, and personalized drinkware. These cups are widely used for gifts, personal use, and even small craft businesses because they look attractive and can be customized in many creative ways. The process of making glitter cups at home is simple, but it requires patience, proper materials, and careful technique to achieve a smooth and long-lasting finish. In this guide, you will learn step by step how to create beautiful glitter cups at home in an easy and professional way.
Choosing the Right Cup for Glitter Design
The first step in making a glitter cup is selecting the right base cup. The most commonly used options are stainless steel tumblers, glass cups, and ceramic mugs. Stainless steel tumblers are the most popular choice because they are durable and provide a smooth surface for glitter application.
The surface of the cup should be clean, smooth, and free from scratches. A good-quality cup ensures that the glitter and adhesive stick properly and last longer without peeling or fading.
Gathering the Required Materials
Before starting the project, it is important to gather all necessary materials in advance. This helps you work smoothly without interruptions. For a basic glitter cup, you will need a clean cup, fine glitter, adhesive or epoxy resin, mixing tools, brushes, and protective gloves. Some people also use sealing sprays for extra protection and shine.
Using high-quality materials is very important because cheap glitter or weak adhesive can affect the final look and durability of the cup.
Preparing the Cup Surface Properly
Proper surface preparation is one of the most important steps in DIY glitter cups. The cup must be completely clean and dry before applying any adhesive. Any dust, oil, or fingerprint on the surface can prevent the glitter from sticking properly.
Washing the cup with mild soap and water is the first step. After drying it completely, wiping the surface with rubbing alcohol helps remove hidden oils and ensures better adhesion. A well-prepared surface creates a strong base for glitter application and improves the final result.
Applying Adhesive or Base Coat
Once the cup is ready, the next step is applying a strong adhesive or base coat. This layer acts as the foundation for the glitter. Some crafters use epoxy resin, while others prefer strong craft glue depending on the design style.
The adhesive should be applied evenly across the surface using a brush. Uneven application can lead to clumps or patchy glitter areas. It is important to work carefully and cover the entire surface smoothly for a uniform look.
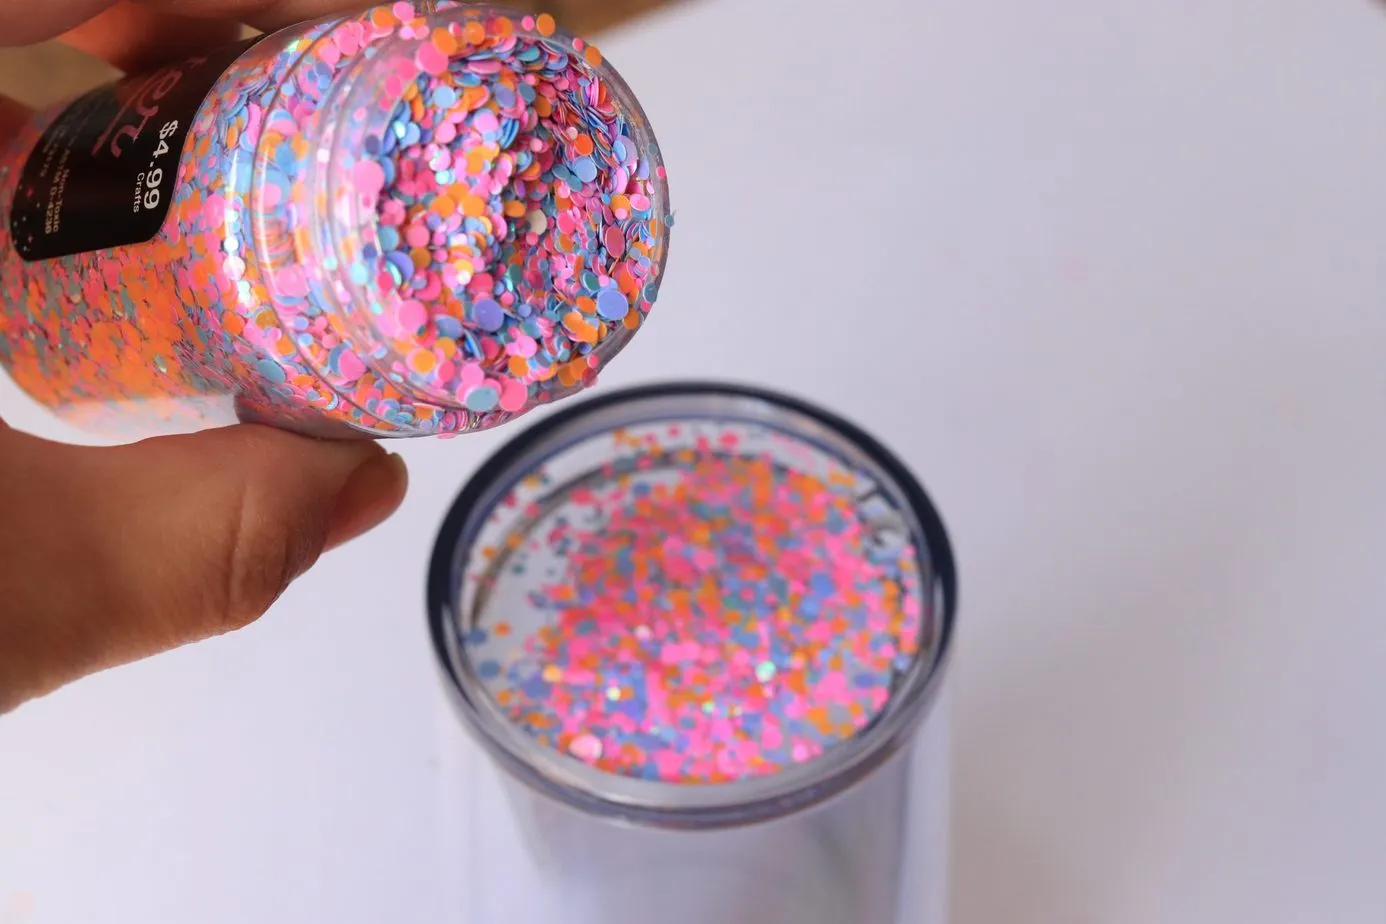
Adding Glitter to the Cup
After applying the adhesive, the glitter is added while the surface is still wet. You can sprinkle glitter evenly or roll the cup gently in a tray of glitter for full coverage. Fine glitter usually gives a smoother and more professional finish compared to chunky glitter.
It is important to rotate the cup slowly while applying glitter to ensure full coverage without missing spots. This step should be done carefully to avoid uneven texture.
Removing Excess Glitter
Once the glitter is applied, excess particles should be removed gently. This helps create a clean and smooth finish without clumps. Light tapping or shaking the cup can help remove loose glitter.
At this stage, it is important to check for any empty spots and fix them before moving to the next step.
Sealing the Glitter Design
Sealing is one of the most important steps in making custom glitter cups. Without proper sealing, the glitter may fall off or lose its shine over time. A clear epoxy resin or sealant is usually applied over the glitter layer to lock everything in place.
The sealant should be applied evenly and allowed to cure properly. This step gives the cup a glossy, smooth, and professional finish while protecting the design from water and scratches.
Drying and Curing the Cup Properly
After sealing, the cup must be left to dry or cure for the recommended time. This process is very important because it ensures that the adhesive and sealant fully harden.
During curing, the cup should be placed in a dust-free area to avoid particles sticking to the surface. Rushing this step can damage the final result and reduce durability.
Final Touches and Cleaning
Once the cup is fully cured, you can inspect it for any imperfections. Small uneven areas can sometimes be corrected with additional sealing or light sanding if needed.
The cup should be cleaned gently and stored safely before use. Avoid harsh washing or scrubbing to maintain the glitter finish for a longer time.
Conclusion
Making custom glitter cups at home is a fun and creative DIY project that allows you to design unique and eye-catching drinkware. By following the correct steps, from choosing the right cup to proper sealing and curing, you can achieve professional-quality results. The key to success lies in preparation, patience, and using the right materials. With practice, you can create beautiful glitter cups for personal use, gifts, or even small business purposes that stand out with a sparkling and stylish look.